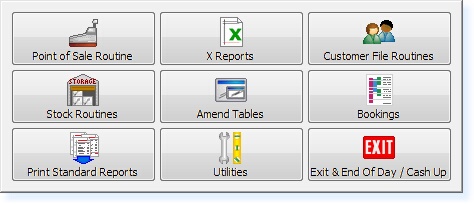
To create an Event Activity from the Main Menu of the Retail System, select Bookings.
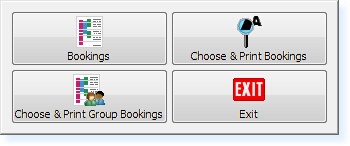
The following menu will appear. Select Bookings
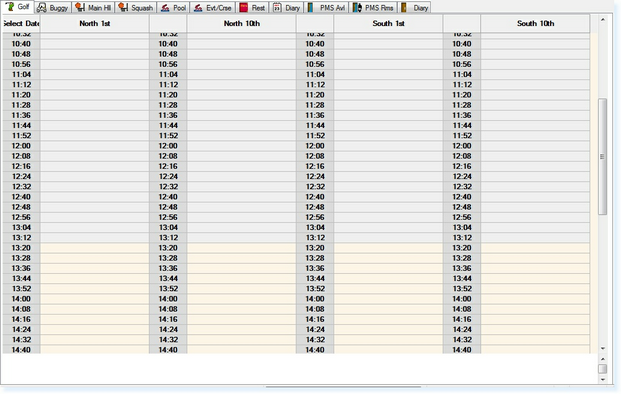
The bookings screen will now appear as below.
Within the Bookings screen, select F7 - Action. The Action Menu will appear.
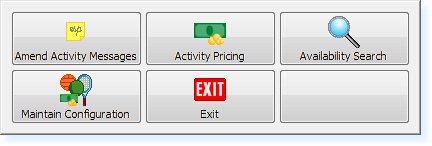
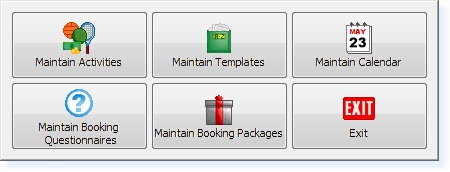
From the Actions Menu, Select Maintain Configuration and the following menu will be shown.
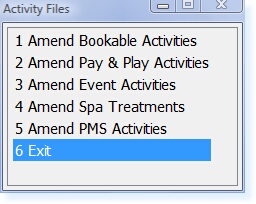
Select Maintain Activities then Create/Amend/Delete Activities, the Activity File Menu will now appear as below.
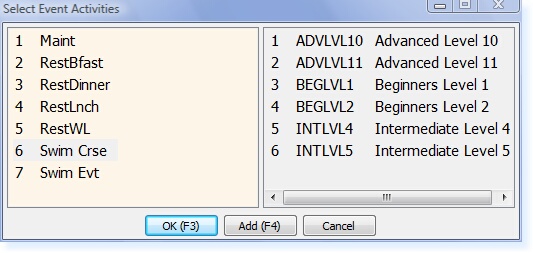
Select Amend Event Activities from the list, the Event Activities menu will now appear as below.
On the left-hand side of the menu is the Activity Type and the corresponding events are shown on the right.
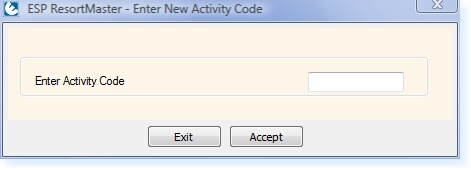
To create a new Event, first take a copy of a current one by highlighting an event and selecting F4 - Add. The input box shown below will now appear.
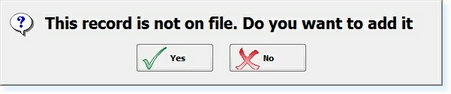
This is where the New Event code is entered (maximum of 8 characters). After entering the code select F3 Accept and you will receive the following prompt.
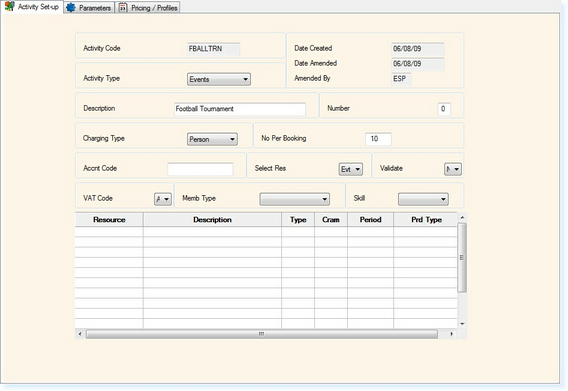
Select Yes at this point to create the Event. The New Event Code will now have been created and the Activity File will be displayed as shown below.
Select the appropriate Activity Type from the list e.g. 'Tournament'
Enter an appropriate Description e.g. 'Football Tournament'
The number field should be set to '0'
The charging type should be set to 'Person'
The No Per Booking field is used to define a maximum number of persons per booking not the maximum number for the event.
Accnt Code should be left blank
Select Res must be set to 'Evt'
Validate is set to 'Y' if attendee tickets are required for the event.
The VAT Code will already be set to 'A'. If the event is to be VAT Exempt, this should be set to 'E'.
Memb Type can allow a membership type to be linked to the event and include discounts etc.
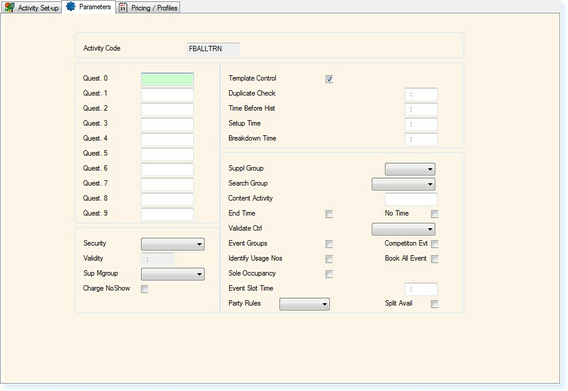
Select the Parameters page of the Activity File and the following screen will be displayed.
Quest 0 - 9 allows up to 10 different questionnaires to be assigned to an activity to include specific questions which must be completed upon making a booking on the activity. These boxes would be populated with the questionnaire reference code. How do you create a Booking Questionnaire?
Template Control must remain Ticked.
The Duplicate Check option allows you to enter a time band. This will activate the booking system to check whether each individual has a duplicate booking for this event within the time-band specified from the start time of the activity.
Time Before Hist controls the time after the start of an event that changes are not permitted to a booking.
Set-up Time and Breakdown Time allows you to specify an amount of time which is required to set-up the event and time to clear equipment away.
Identify Usage Numbers allows a quick method of entering the number of participants onto an individual event. If this box is ticked, whenever a booking is created for this activity a box similar to the one below will be displayed to enter the number of participants.
Book All Event allows you to ensure that it only takes one person to book the entire event out instead of a proportion of the event. (For Group Bookings where one person hires an area but individual names are collected/recorded against the event)
Sole Occupancy activates the VAT Notice 742 Section 5, Land and Property / Leisure Activities to automatically refund the VAT on a booking which meets the criteria of the VAT Notice.
Event Slot Time allows you to specify the time band upon which the pricing is based. This would be used where the same activity takes place more than once on the same day, but for different lengths of time, as there can only be one price matrix per activity, per day.
Select F2 Exit twice to save the details entered and return to the Activity File menu.
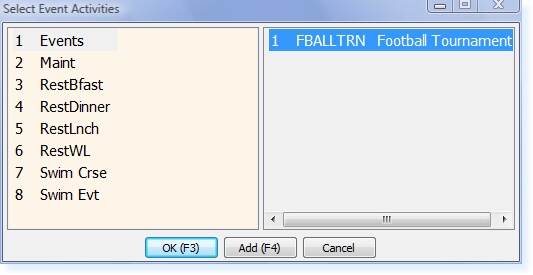
Select Amend Event Activities again and the new Event will be displayed as below.
The Event has now been created successfully. The Event can now be added to Templates.
|